brother sewing machine ls2125i instruction manual
Brother LS2125i Sewing Machine: A Comprehensive Guide
Discover detailed guidance for your Brother LS2125i, accessing instruction manuals via ManualsLib and Pinterest. Explore parts resources and troubleshooting tips online today!
The Brother LS2125i is a popular, lightweight, and user-friendly sewing machine, ideal for both beginners and experienced sewists. Finding the right resources, particularly the instruction manual, is crucial for maximizing its potential. Fortunately, several online platforms offer access to this valuable information. ManualsLib hosts a comprehensive digital version of the Brother LS2125i instruction manual, including detailed page views – even specific pages like page 66 – allowing users to quickly find answers to their questions.
Pinterest serves as a visual gateway, linking to instruction manuals and showcasing images of the machine and its components. These resources, alongside parts suppliers like Ashley Smalley, provide a complete support system for owners. Understanding where to locate these manuals and parts ensures a smooth and enjoyable sewing experience with your Brother LS2125i.
Key Features and Specifications
While the instruction manual details all features, the Brother LS2125i excels in simplicity and functionality. It’s a mechanical sewing machine, meaning it relies on dials and levers rather than computerized settings. Key features, as outlined in available manuals on platforms like ManualsLib, include 15 built-in stitches – offering versatility for various projects. The machine boasts adjustable stitch length and width, providing customization options.
Its lightweight design enhances portability, making it suitable for classes or travel. Resources found on Pinterest highlight its ease of use, even for beginners. Though specifications aren’t explicitly detailed in the provided snippets, the machine’s compact size and straightforward operation are consistently emphasized. Accessing the full instruction manual unlocks a complete understanding of its capabilities and settings.
Unboxing and Initial Setup
Upon unboxing your Brother LS2125i, carefully inspect all included components. The instruction manual, readily available on ManualsLib and Pinterest, is your primary guide. Typically, you’ll find the sewing machine itself, a power cord, a foot controller, various presser feet (standard, buttonhole, etc.), bobbins, needles, a screwdriver, and a seam ripper.
Initial setup involves connecting the power cord and foot controller. Refer to the manual for proper placement and connection points. Next, wind a bobbin – the manual provides a step-by-step illustration. Insert the bobbin correctly into the bobbin case. Finally, thread the machine following the numbered diagram in the manual. Ensure proper threading for smooth operation. A thorough review of the manual before starting is highly recommended.
Understanding the Machine Components
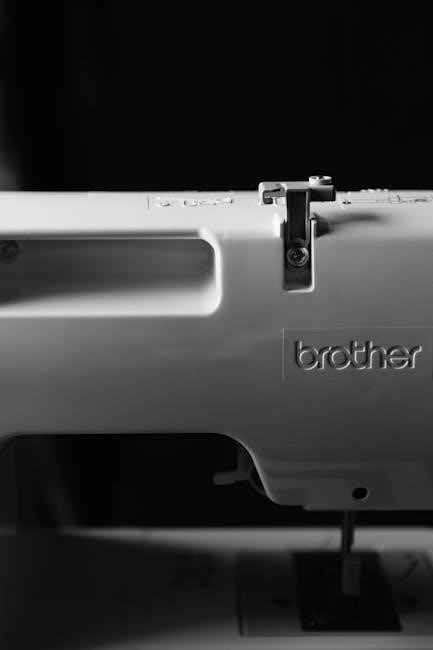
The Brother LS2125i boasts several key components, detailed within its instruction manual – easily found on resources like ManualsLib and Pinterest. The main body houses the internal mechanisms for stitch formation. The needle, driven by the machine, creates the stitches, while the presser foot holds the fabric in place.
Understanding the bobbin winding and insertion process, clearly illustrated in the manual, is crucial. The bobbin case holds the lower thread, interacting with the needle thread to form a stitch. The foot controller regulates the sewing speed. Familiarize yourself with the stitch selection dial, allowing you to choose from various stitch patterns. The tension dial controls thread tightness. Refer to the manual for detailed diagrams and explanations of each component’s function.
Main Body and Stitch Formation
The core of the Brother LS2125i’s operation lies within its main body, meticulously explained in the instruction manual available on platforms like ManualsLib. Stitch formation is a synchronized process. The needle, guided by the needle bar, penetrates the fabric, creating a loop. Simultaneously, the rotating hook catches this loop, intertwining it with the bobbin thread.
This interlocking action forms a secure stitch. The feed dogs, positioned beneath the presser foot, advance the fabric with each stitch cycle. Proper timing between the needle and hook is essential for consistent stitch quality, detailed in the manual’s diagrams. Understanding this mechanism, as outlined in the LS2125i’s guide, is key to successful sewing and troubleshooting potential issues.
Bobbin Winding and Insertion
Proper bobbin preparation is crucial for smooth sewing on the Brother LS2125i, thoroughly detailed within the instruction manual found on resources like ManualsLib. Begin by placing the thread spool on the spool pin and guiding the thread through the tension disc. Wind the thread evenly around the bobbin, utilizing the bobbin winder mechanism.
Once full, carefully remove the bobbin. The manual illustrates the correct direction for inserting the bobbin into the bobbin case. Ensure the thread unwinds in the proper direction to avoid tangling. Finally, insert the bobbin case into the machine. Correct bobbin insertion, as shown in the LS2125i guide, prevents skipped stitches and ensures consistent thread delivery.
Threading the Machine: A Step-by-Step Guide
Accurate threading is fundamental for optimal performance of your Brother LS2125i, comprehensively explained in the official instruction manual available on platforms like ManualsLib and Pinterest. Begin by raising the presser foot; this opens the tension discs. Guide the thread from the spool, through the first thread guide, and then around the tension discs.
Next, follow the numbered diagram in the manual to thread the take-up lever and then down to the needle. Ensure the thread is securely inserted into the needle eye in the correct direction. Proper threading, as visually demonstrated in the LS2125i guide, prevents thread breakage and ensures consistent stitch formation.
Basic Sewing Techniques
Mastering fundamental techniques with your Brother LS2125i begins with understanding the machine’s capabilities, detailed within the instruction manual found on resources like ManualsLib and Pinterest. Start with practicing straight stitching on scrap fabric, ensuring consistent seam allowance. The manual illustrates proper fabric feeding and maintaining a steady sewing speed.

Next, explore zigzag stitching, useful for finishing raw edges and creating decorative elements. Adjust stitch length and width according to your project needs, referencing the stitch guide in the manual. Remember to always test stitch settings on scrap fabric before sewing your final project. Consistent practice, guided by the LS2125i manual, builds sewing confidence.
Straight Stitching
Achieving a perfect straight stitch on your Brother LS2125i relies on proper setup and technique, thoroughly explained in the instruction manual available on platforms like ManualsLib and Pinterest. Begin by selecting the straight stitch setting, typically indicated by a line symbol. Ensure your fabric is aligned with the seam guide on the needle plate for consistent seam allowance.
Maintain a steady, moderate sewing speed, allowing the machine to feed the fabric evenly. Avoid pulling or pushing the fabric, as this can distort the stitch. Refer to the manual’s diagrams for correct thread tension settings. Practice on scrap fabric to refine your technique before tackling your project. Consistent practice, guided by the LS2125i manual, will yield professional-looking results.
Zigzag Stitching
Mastering the zigzag stitch on your Brother LS2125i opens a world of decorative and functional sewing possibilities, detailed within the readily available instruction manual found on resources like ManualsLib and Pinterest. Select the zigzag stitch setting, identifiable by its zigzag pattern symbol. Adjust the stitch width using the designated dial; wider settings create broader zigzag lines.
The manual illustrates how to utilize zigzag stitching for finishing raw edges, preventing fabric fraying, and creating stretch seams. Experiment with different stitch widths and lengths on scrap fabric to understand their effects. Proper thread tension is crucial for a balanced zigzag stitch, as detailed in the manual’s diagrams. Consistent practice, guided by the LS2125i manual, ensures neat and professional zigzag applications.
Adjusting Stitch Length and Width
Precise control over stitch length and width is fundamental to successful sewing with the Brother LS2125i, and the instruction manual – accessible via platforms like ManualsLib and Pinterest – provides clear guidance. Locate the stitch length dial, typically marked with measurements in millimeters. Rotating this dial adjusts the distance between each stitch; shorter lengths create denser seams, while longer lengths are suitable for basting.
Similarly, the stitch width dial controls the breadth of stitches like zigzag. The manual’s diagrams illustrate how varying width impacts fabric coverage and seam strength. Always test settings on scrap fabric before sewing your project. Understanding these adjustments, as detailed in the LS2125i manual, allows for customized stitching tailored to different fabrics and applications.
Troubleshooting Common Issues
Encountering problems with your Brother LS2125i is common, but often easily resolved with guidance from the instruction manual, readily available on sites like ManualsLib and Pinterest. Frequent issues include thread breakage and skipped stitches. The manual details causes – improper threading, incorrect needle type, or insufficient tension – and provides step-by-step solutions.
For thread breakage, re-thread the machine carefully, ensuring the thread is properly seated in all guides and the tension disc. Skipped stitches often indicate a bent or dull needle; replace it with a new one of the correct size and type for your fabric. The LS2125i manual’s troubleshooting section offers a systematic approach to diagnosing and fixing these and other common sewing machine woes.
Thread Breakage Problems
Frequent thread breakage on your Brother LS2125i often signals a threading issue, as detailed in the instruction manual found on resources like ManualsLib and Pinterest. Ensure the thread path is clear and the thread is correctly seated in the tension discs – this is crucial. Incorrect tension settings are a primary culprit; the manual guides you through adjusting both upper and bobbin tension.
Also, verify you’re using the appropriate thread type and size for your fabric. A dull or bent needle can also cause breaks, necessitating replacement. The LS2125i manual emphasizes the importance of regular needle checks. Finally, confirm the bobbin is wound evenly and inserted correctly. Following these steps, as outlined in the manual, will minimize frustrating thread breakage.
Skipped Stitch Solutions
Encountering skipped stitches on your Brother LS2125i? The instruction manual, accessible via ManualsLib and Pinterest, points to several common causes. First, ensure the needle is correctly inserted – it must be fully pushed up into the needle clamp. Using the wrong needle type for your fabric is another frequent issue; consult the manual’s needle guide.
Incorrect threading, particularly if the thread isn’t properly seated in the take-up lever, can also lead to skipped stitches. Verify the bobbin is correctly inserted and that the bobbin case is clean. Adjusting the presser foot pressure might also resolve the problem, as detailed in the manual. Finally, a dull or damaged needle should be replaced immediately for optimal performance.
Maintenance and Cleaning
Regular maintenance, as outlined in your Brother LS2125i instruction manual (found on ManualsLib and Pinterest), is crucial for longevity. Begin by powering off and unplugging the machine. Use a soft brush to remove lint and dust from the bobbin area and feed dogs. The manual emphasizes cleaning the bobbin case frequently to prevent thread buildup.
Avoid using liquid cleaners directly on the machine; instead, apply a small amount to a soft cloth. Oil the machine’s moving parts – specifically those indicated in the manual – to ensure smooth operation. Regularly inspect the needle for damage and replace it as needed. Proper cleaning and oiling, following the manual’s guidance, will keep your LS2125i running efficiently for years.
Advanced Features and Stitch Options
The Brother LS2125i, while beginner-friendly, offers a range of stitch options beyond basic straight and zigzag. Your instruction manual – accessible via resources like ManualsLib and Pinterest – details these features. Explore decorative stitches for embellishing projects, and understand the adjustable stitch length and width controls for customization.
The manual illustrates how to select different stitch patterns using the dial and provides guidance on tension adjustments for optimal results with various fabrics. While not a computerized machine, the LS2125i’s versatility allows for creative sewing. Refer to the manual for specific stitch applications and troubleshooting tips related to advanced features, maximizing your machine’s potential.
Using Optional Presser Feet
Enhance your Brother LS2125i’s capabilities with optional presser feet, expanding its sewing potential. While the standard foot handles many tasks, specialized feet – details found in your instruction manual (available on sites like ManualsLib and Pinterest) – unlock new techniques. Consider a zipper foot for precise zipper insertion, or a buttonhole foot for consistently neat buttonholes.
The manual will illustrate how to correctly attach and detach these feet, ensuring proper alignment and function. Explore options like a blind hem foot for professional-looking hems, or a gathering foot for creating ruffles. Remember to consult the manual for compatibility and recommended settings when using each foot, maximizing precision and achieving professional results with your sewing projects.
Safety Precautions
Prioritize safety when operating your Brother LS2125i sewing machine. Always disconnect the power supply before threading, changing the needle, or performing any maintenance – information detailed in your instruction manual (accessible via ManualsLib and Pinterest). Keep fingers away from the needle area during operation to prevent accidental punctures.
Never force the fabric under the needle; let the machine feed it smoothly. Ensure the machine is stable and on a level surface before use. Avoid using damaged power cords or plugs. Keep the machine clean and free of dust and lint to prevent malfunctions. Refer to the manual for specific warnings and guidelines to ensure safe and enjoyable sewing experiences, protecting both yourself and your machine.
Where to Find the Instruction Manual Online
Locating your Brother LS2125i instruction manual is straightforward! ManualsLib (manualslib.com) provides a comprehensive, searchable online version, including specific page access like page 66. Pinterest (in.pinterest.com and www.pinterest.com) hosts numerous links and images of the manual, offering visual guidance. You can find instruction manuals and related resources through image searches as well.
These online resources offer convenient access to detailed diagrams and step-by-step instructions for setup, threading, maintenance, and troubleshooting. Utilizing these platforms eliminates the need for a physical copy, providing instant access to vital information whenever you need it. Explore these websites to maximize your sewing experience with your Brother LS2125i.
Resources for Parts and Repairs

Sourcing replacement parts or repair services for your Brother LS2125i can be easily accomplished online. Ashley Smalley (via storage.googleapis.com and eBayimg.com) specializes in Brother sewing machine parts, offering a potential source for needed components. While the provided links point to parts availability, broader online searches using the model number “LS2125i” will reveal additional suppliers.

For more complex repairs, consider contacting authorized Brother service centers. Local sewing machine repair shops are also valuable resources. Remember to have your machine’s model number readily available when requesting parts or service. Regularly checking online marketplaces can also uncover used or refurbished parts at potentially lower costs, extending the life of your machine.